Those who run the WooCommerce store must be aware of the importance of the checkout page. On many occasions at the checkout page, you need to add some extra fields in the WooCommerce checkout form or other fields. For your convenience, we have decided to add a brief article on how to add an extra field to WooCommerce checkout page.
There are particular predefined fields for users set by WooCommerce checkout page. In this tutorial, we will discuss how to add a field to the checkout page, checkout validation process, save checkout fields, and display field value at the WooCommerce order page.
Before, we discuss all the above topics let’s understand What is the checkout page?
It is an eCommerce term that proceeds users after add to cart product items.Checkout page is significant for both customers and sellers. This page contians billing & shipping informaiton, and payment methods informaiton. If customer don’t provide the required informaiton then can’t make purcahse. Now, you can get an idea how it is important for sellers. WooCommerce doesn’t provide yo solution in the bydefault settings now we can better undersrand we have discussed below step by step.
Add Fields To Checkout Form
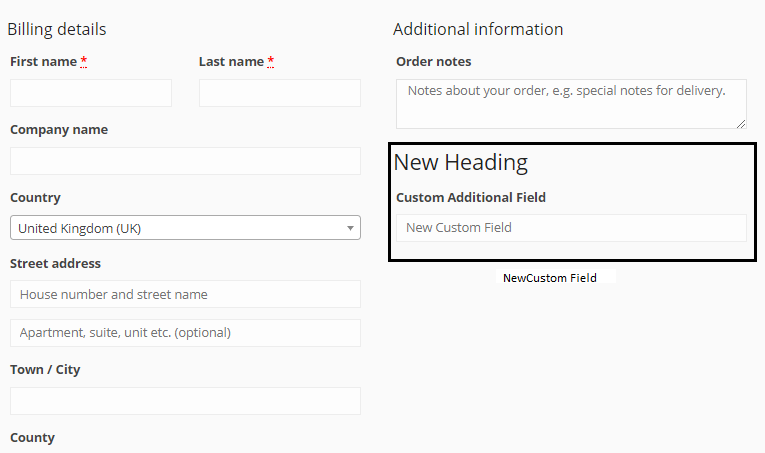
For many reasons on the checkout page you have to add custom WooCommerce fields, it will take a little time to add this job. Let suppose this is your checkout page.

How to dd custom fields
There are two ways for adding custom fields to the checkout page for example:
- Add custom fields through custom coding.
- Add custom fields by installing the plugin.
Add custom fields through custom coding.
This method is applicable for those who have basic knowledge about coding. For the custom field, we have added code step by step given below. Just copy the code and paste it into the theme’s functions.php file.
add_filter( 'woocommerce_checkout_fields' , 'add_checkout_field' );
// Our hooked in function - $fields is passed via the filter!
function add_checkout_field( $fields ) {
    $fields['billing']['custom_field_name'] = array(
        'label'     => esc_html__('Field Label', 'woocommerce'),
        'placeholder'   => esc_html_x('Field Value', 'placeholder', 'woocommerce'),
        'required'  => true
    );
    return $fields;
}
When you add code into the funcitons.php file you will get result as:
Process Checkout For Validation
Checkout for validation custom field add the code given below:
add_action('woocommerce_checkout_process', 'extra_checkout_field_process');
function extra_checkout_field_process() {
  // if the field is set, if not then show an error message.
  if (!$_POST['custom_field_name']) wc_add_notice(esc_html__('Please enter value.', 'woocommerce') , 'error');
}
Save Checkout Fields
Now we confirm the entered details for the custom field solved with the following code.
add_action('woocommerce_checkout_update_order_meta', 'save_checkout_field_update_order_meta');
function save_checkout_field_update_order_meta( $order_id ) {
  if (!empty($_POST['custom_field_name'])) {
    update_post_meta($order_id, 'custom_field_key', wc_clean($_POST['custom_field_name']));
  }
}
Display Field Value at WooCommerce Order Page
add_action( 'woocommerce_admin_order_data_after_billing_address', 'data_after_billing_address', 10, 1 );
function data_after_billing_address( $order ) {
    global $post_id;
    $order = new WC_Order( $post_id );
    echo '<p><strong>' . esc_html__('Field Value', 'woocommerce') . ':</strong> ' . get_post_meta($order->get_id(), 'custom_field_key', true ) . '</p>';
}
Add custom fields by installing the plugin.
This step is helpful for those who are non-coder. Thus, you can use many plugins for their purpose.
– WooCommerce Checkout Manager
When you add the plugin to your site you don’t need coding just install and activate the plugin.
Conclusion
In this article, we have discussed how to add an extra field to WooCommerce checkout page. We expect you learned how to adjust the custom field for the checkout page. Good luck!
Recent Comments